If you’re a newbie, it can be challenging to understand what Switch homebrew is all about. If you don’t know where to start, you’ve stumbled in the right place. In this Switch homebrew beginner’s guide, we will answer the proverbial “What is Switch homebrew?” and find out all the necessary information to get you started.
What Is Switch Homebrew?
Switch Homebrew or simply homebrew is a software or app that isn’t authorized by Nintendo. It is similar to the jailbreaking process of the Apple ecosystem. Homebrew includes emulators, games, editing apps, tools, custom firmware, and other applications.
What Is Custom Firmware?
CFW or custom firmware offers the homebrew process more access to Nintendo’s system compared with the standard userland homebrew that is mostly available on the majority of systems. As of July 2021, all Nintendo Switches released before July 2018 are compatible with custom firmware. Nintendo Switches released after July 2018 can only be exploited if they have a 4.1.0 firmware version.
Is It Really Possible to Homebrew a Switch?
As described, Switch homebrew apps are custom-made, third-party software that isn’t authorized by Nintendo itself. Homebrew is possible on your Switch given that it is running on a 9.1.0 or lower 1st-generation system.
Types of Exploits on Nintendo Switch
fusee-gelee
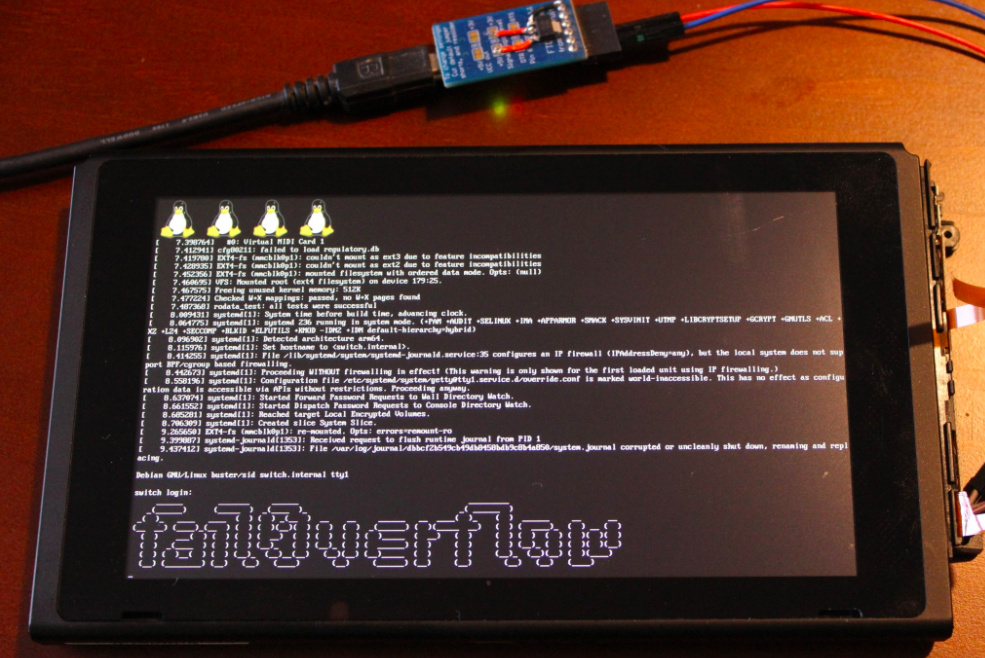
Also called CVE-2018-6242 or ShofEL2, fusee-gelee is considered a primary exploit that takes advantage of an oversight in Nintendo Switch’s built-in RCM or recovery mode. This type of exploit is a non-persistent and tethered exploit, requiring a secondary device to activate CFW every time you reboot your device. fusee-gelee isn’t the same as untethered cold-boot types of exploit available on other platforms, including Henkaku Enso for Vita, and Boot9strap for 3DS. The fusee-glee exploit offers comprehensive system control. Hence, it can run even before the standard bootloader code. With fusee-glee, the standard operating system of Switch can also be modified. It also allows dumping of the bootloader as well as any pieces of information on any console.
Deja-vu
Deja-vu is the secondary exploit group within the Nintendo Switch system. This type of exploit takes advantage of an oversight in the warmboot firmware of Nintendo Switch. Warmboot firmware includes the code responsible when you put Nintendo Switch to sleep mode and wake it up. Similar to fusee-glee, Deja-vu also allows a comprehensive system takeover since you can reboot your device into a state with the similar features provided in fusee-gelee. It is a browser-based, app-only exploit. As such, you must first launch the exploit via the browser every time you reboot your device into the stock firmware. Deja-vu is only available from 1.0.0 to 3.0.0 and 4.0.1 to 4.1.0 firmware versions; however, it theoretically works until 7.0.1 as well as higher firmware versions that will be released in the future. Currently, Deja-vu implementations are Caffeine for 2.0.0 to 3.0.0 and 4.0.1 to 4.1.0 firmware and Nereba for 1.0.0 firmware.
Checking the Recovery Mode (RCM)
In this part, a detailed guide on how to access recovery mode will be explained. It will also provide you with the steps on determining whether your Switch is vulnerable to fusee-glee and process the payload. The Recovery Mode (RCM) is the perfect method to run CFW since it is compatible with all firmware. Despite using the software-based exploit, it is crucial to identify whether your Switch has exploitable RCM features as well as learn how to run payloads.
Prerequisites
Before the actual process of checking the RCM, you must have the following prerequisite requirements:
MicroSD Card Although a 4 GB microSD card is fine, you should have 64GB or higher storage as the recommended size. A small one is more than enough to process the CFW; however, bigger sizes are recommended for creating emuMMCs, processing NAND backups smoothly, and installing Switch games.
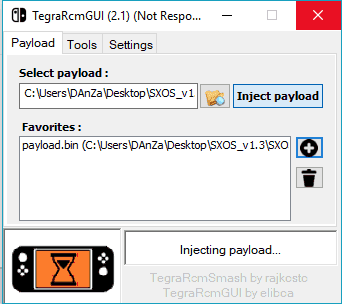
A Payload-Processing App Once you have identified that your Switch is vulnerable to fusee-glee, you can buy and install a modchip, or purchase a dedicated payload-sending dongle if you currently don’t have one. As an alternative, you can also download and install one depending on your operating system: Android – https://github.com/MenosGrante/Rekado/releases Linux and OSX – https://github.com/Qyriad/fusee-launcher Windows – https://github.com/eliboa/TegraRcmGUI/releases
USB/USB Type C Adapter/Cable It is essential for connecting your Nintendo Switch to your preferred payload sender. If you already have a payload processing device, no need for this one.
Equipment to Send a Payload As an option, you can purchase a modchip or dongle as your dedicated payload sending device.
An Option to Ground Pin 10 on Your Switch’s Right JoyCon Rail To access the Recovery Mode, you should hold down volume up, power, and the home buttons simultaneously. By home button, it means holding the hardware home button instead of the JoyCon’s home button. Since Nintendo Switch doesn’t have a home button, you can simulate it by pressing it down to ground the Pin 10 of the right joycon rail.
Test Payload Zip Package If you have a payload sender device, download the test payload zip package for verifying your Switch’s vulnerability to fusee-gelee.
Part 1: Accessing Your Switch’s Recovery Mode
Once you are acquainted with the necessary prerequisites, the next step is to get into RCM. Here are the steps to get into recovery mode for Nintendo Switch: If your Nintendo Switch won’t turn on, the process has been completed successfully. Otherwise, repeat the steps until it won’t power on. For this part, practice extreme caution to ground Pin 10 since bridging the wrong ones will burst your Switch!
Part 2: Verify If Your Switch Is Vulnerable to fusee-gelee
To avoid overwhelming you with too many technical details, we will describe TegraRCMGUI’s steps on how to verify your Switch. If you’re using a different payload sending service or device, you must check with the manufacturer itself for the complete steps. As an overview, here are the steps on how to verify if your Nintendo Switch is vulnerable to fusee-gelee on Windows OS: If you’ve made a successful attempt, a success prompt will be displayed on your Nintendo Switch. Otherwise, repeat the steps or try connecting your device using another USB cable.
Hacking Your Nintendo Switch
Once Part 1 and 2 are completed in this guide, you’ve already identified that your Nintendo Switch is vulnerable to fusee-gelee to run CFW. The next step is to prepare your microSD card with the appropriate software. As mentioned, we don’t want to overwhelm you with too many Switch homebrew jargons, especially if you’re a first-timer or if you aren’t techy enough to tweak. Hence, we will highlight fusee-gelee in hacking your Nintendo Switch.
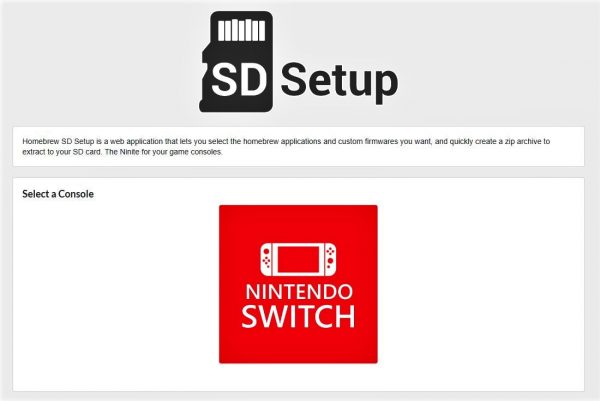
Download and Install Software
Assuming that you will be using Homebrew SD Setup, follow these steps to prepare your SD card.
Prepare Software
Post-Processing
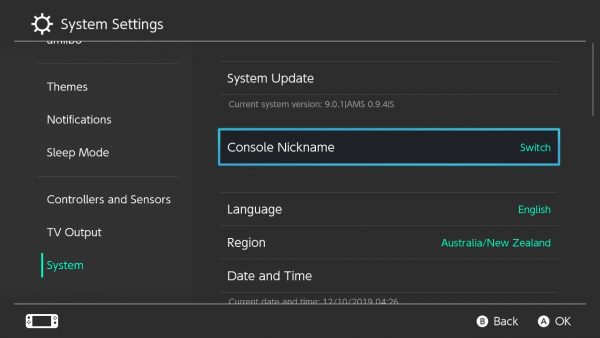
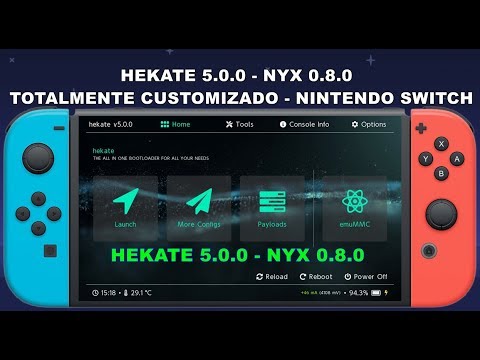
Congratulations! You’re prepared everything you need for your Switch homebrew to get running. For post-processing, you must launch the Atmosphere CFW by performing the following steps: Hekate will now load Atmosphere. To verify if you are already in Atmosphere, launch the Homebrew Menu. Another option is to verify in the System Settings of your Nintendo Switch.
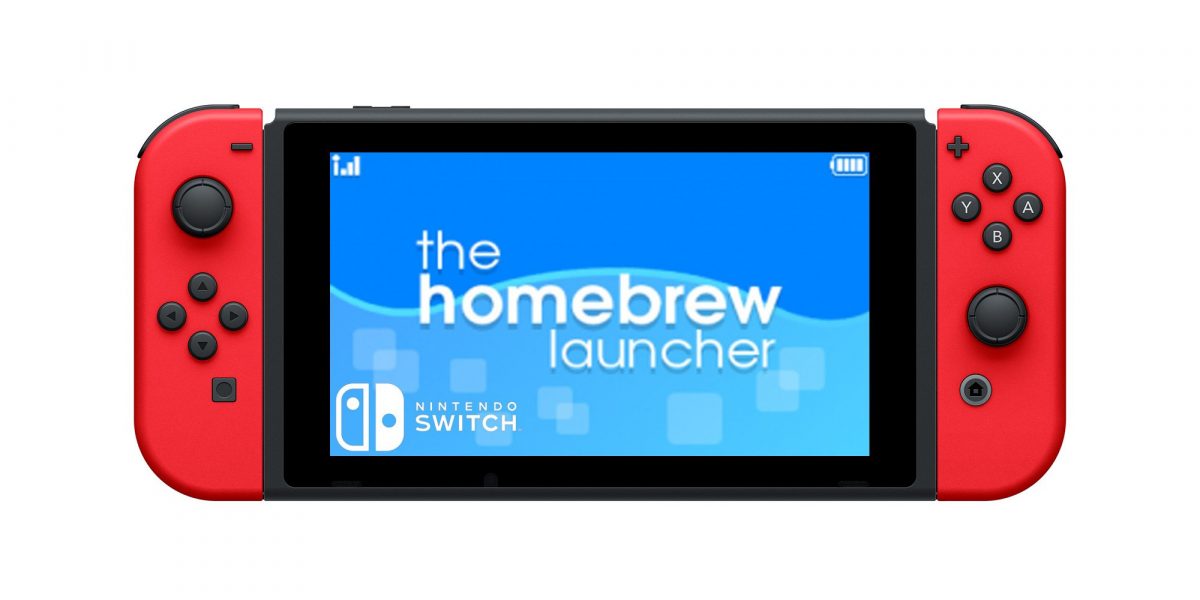
Opening Switch’s Homebrew Menu
You can install Homebrew by copy-pasting the NRO file in the /switch folder on the SD card access through the Homebrew Menu. To open Switch’s Homebrew Menu on your Nintendo Switch, hold the R button while opening any app or game. You can also open the Album itself. Note: For games, you must hold the R button after selecting a user profile (if applicable). Not all Switch homebrew apps will open through the Album. As such, you need to launch them through a specific game. If you want to access the Album in CFW, hold down the R button while clicking the Album icon.
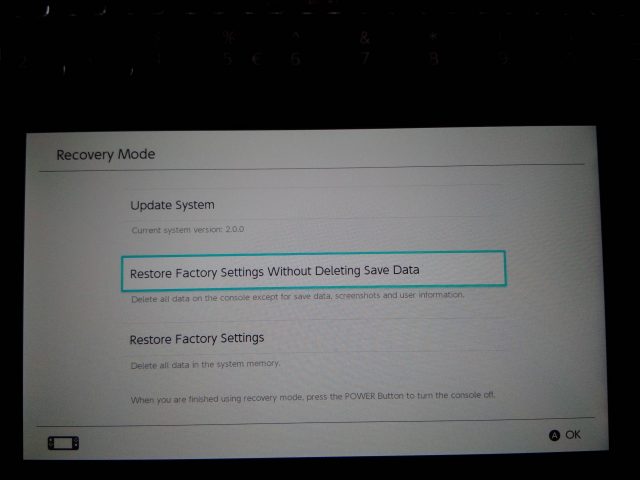
Prevent Switch From Getting Bricked
Now after the configuration, allow your device to run Switch homebrew apps, consider creating an emuMMC to prevent your Nintendo Switch from getting bricked. It is also highly recommended so you can have the latest firmware version for playing games without losing access to the custom firmware. Before you start the actual process, make sure you have the following essentials:
Hekate’s and Atmosphere’s later versions A microSD card with a minimum of 64 GB storage Hackable Nintendo Switch
Here are the steps on how to create an emuMMC for your Switch homebrew essentials: Congratulations! You have successfully created an emuMMC. To verify, follow these steps:
Set Up Homebrew on Your Switch
While installing homebrew on your Switch is tricky and can potentially brick your hardware, the payoff makes the struggle well worth it. Best of luck in getting homebrew set up on your Nintendo Switch!
![]()
![]()
![]()
![]()